
The Idea
Well the idea was pretty simple: a friend of mine told me that an amplifier he had in his room stopped working, so after some quick troubleshooting and a death diagnosis I proposed to build a new one myself. At first I was hoping that my knowledge in electronics, however small, could be enough to design and build something decent, but I surrendered pretty soon and only built a nice-looking case to host an amplifier board bought online.
Electronics
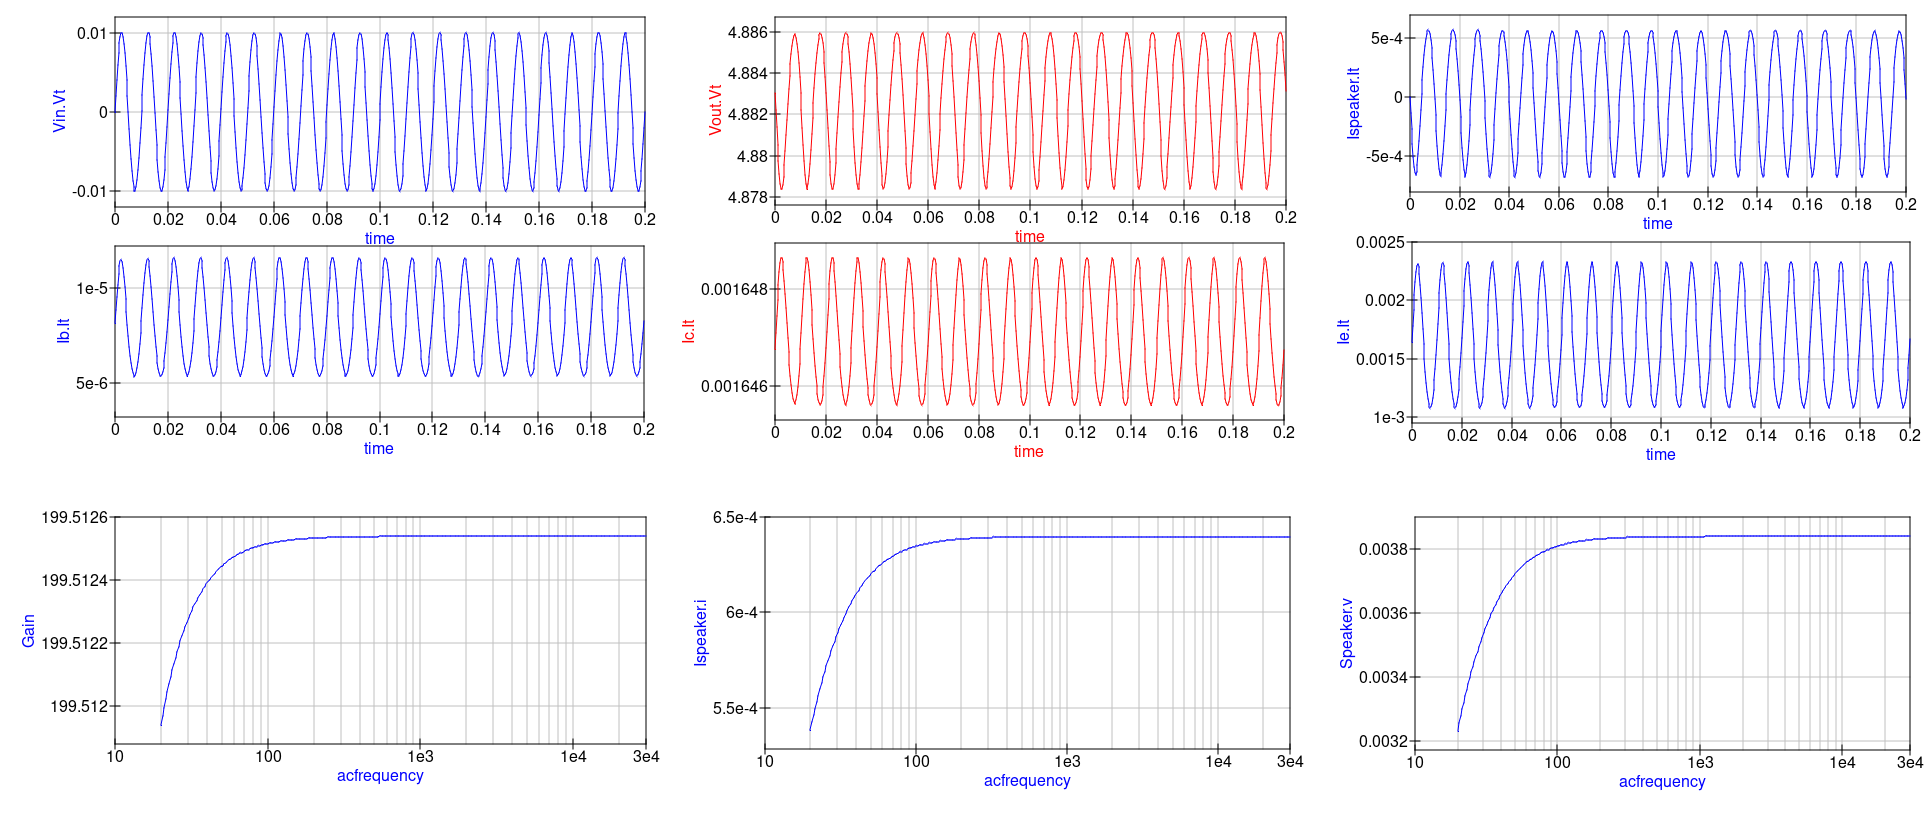
Not only my approximate simulations were foreseeing delusional failures: practical trials on the breadboard worsened my self-consideration even more, and with special effects too (a.k.a. magic smoke from transistors).
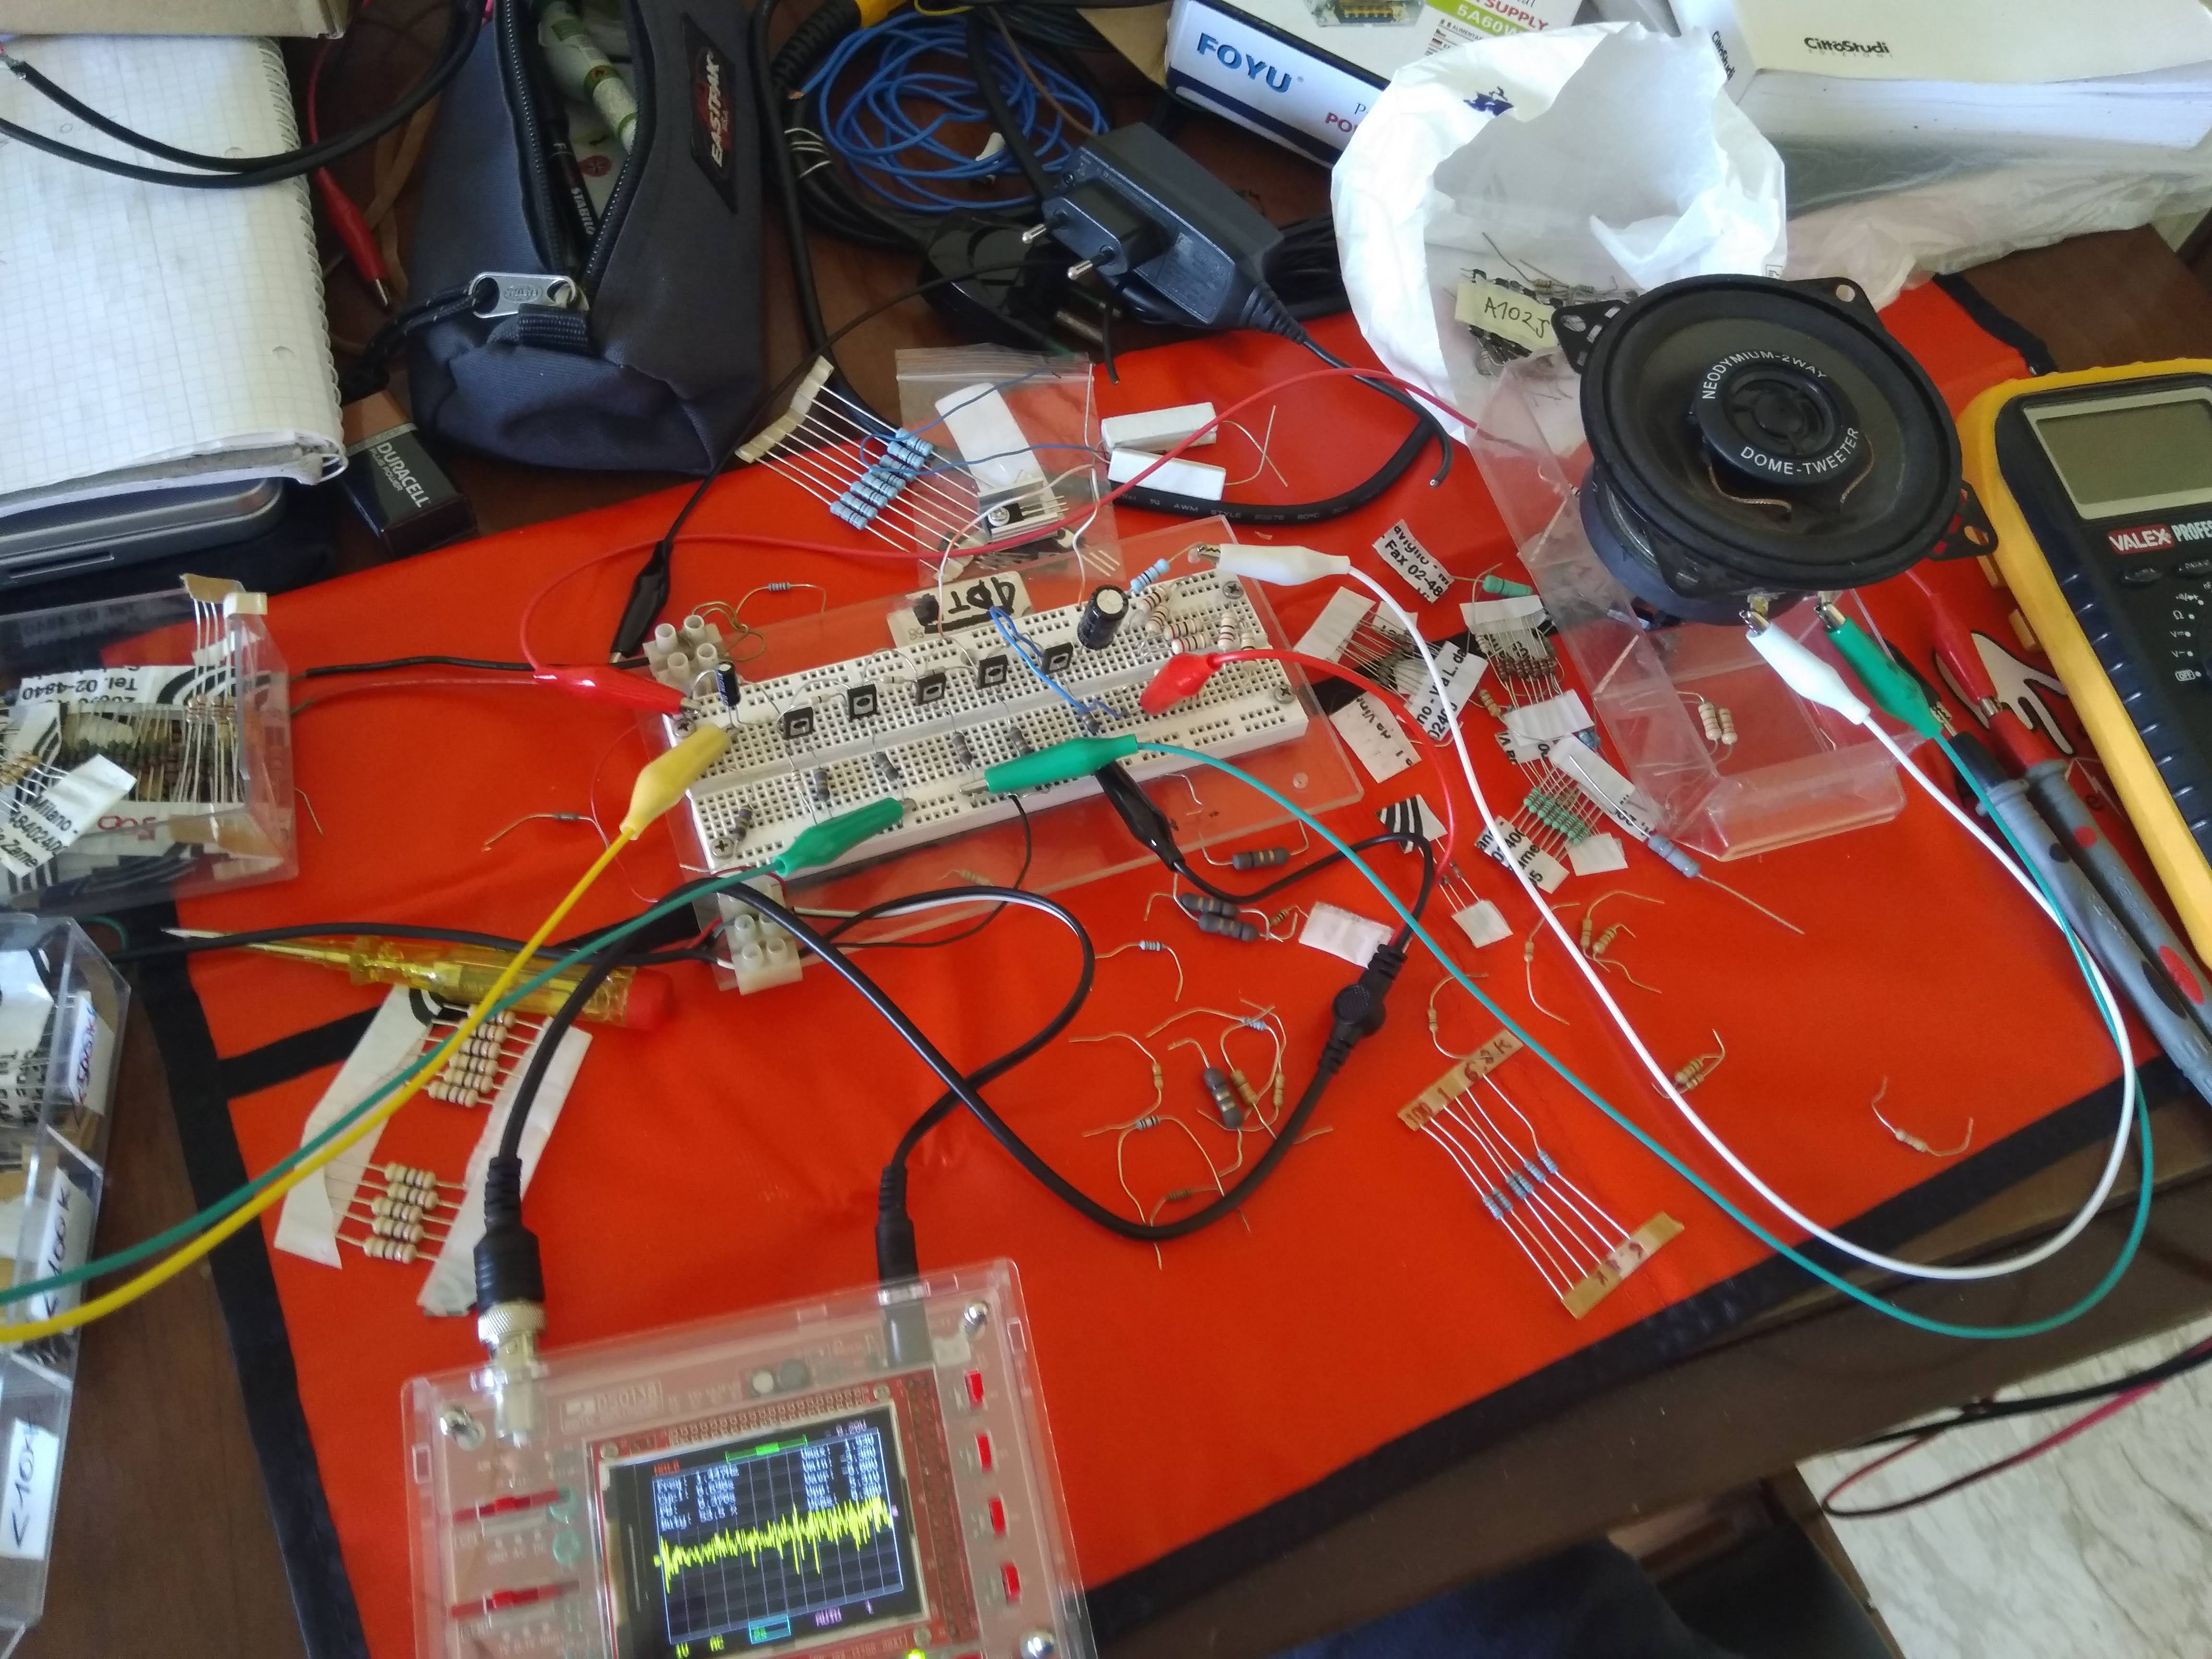
When the time to leave my pride aside finally came, I bought a cheap but good-reviewed class D amplifier board online together with a (still cheap, matters of low budget) power supply (roughly €10 + €10), but things got no better at all. The amplifier was emitting a terrible rattling noise, which after some investigation I found was sourcing from the apparently poorly isolated switching power supply. I spent several days trying to design an effective filter to put on the power line or a simple way to provide good EM isolation, but the problem kept persisting, and the project at this point pretty much died for a solid year.
This situation took a turn one day while I was wandering around in a thrift store (I love those places) and found the classic cardboard box full of old phone chargers and laptop power supplies. One of them was rated 14V/4A, quite perfect for my need I thought, and surely of better quality and EM isolation. Well that was it, €1.10 brought the project back to life, and boy did it sound good.
Wooden Case and Details
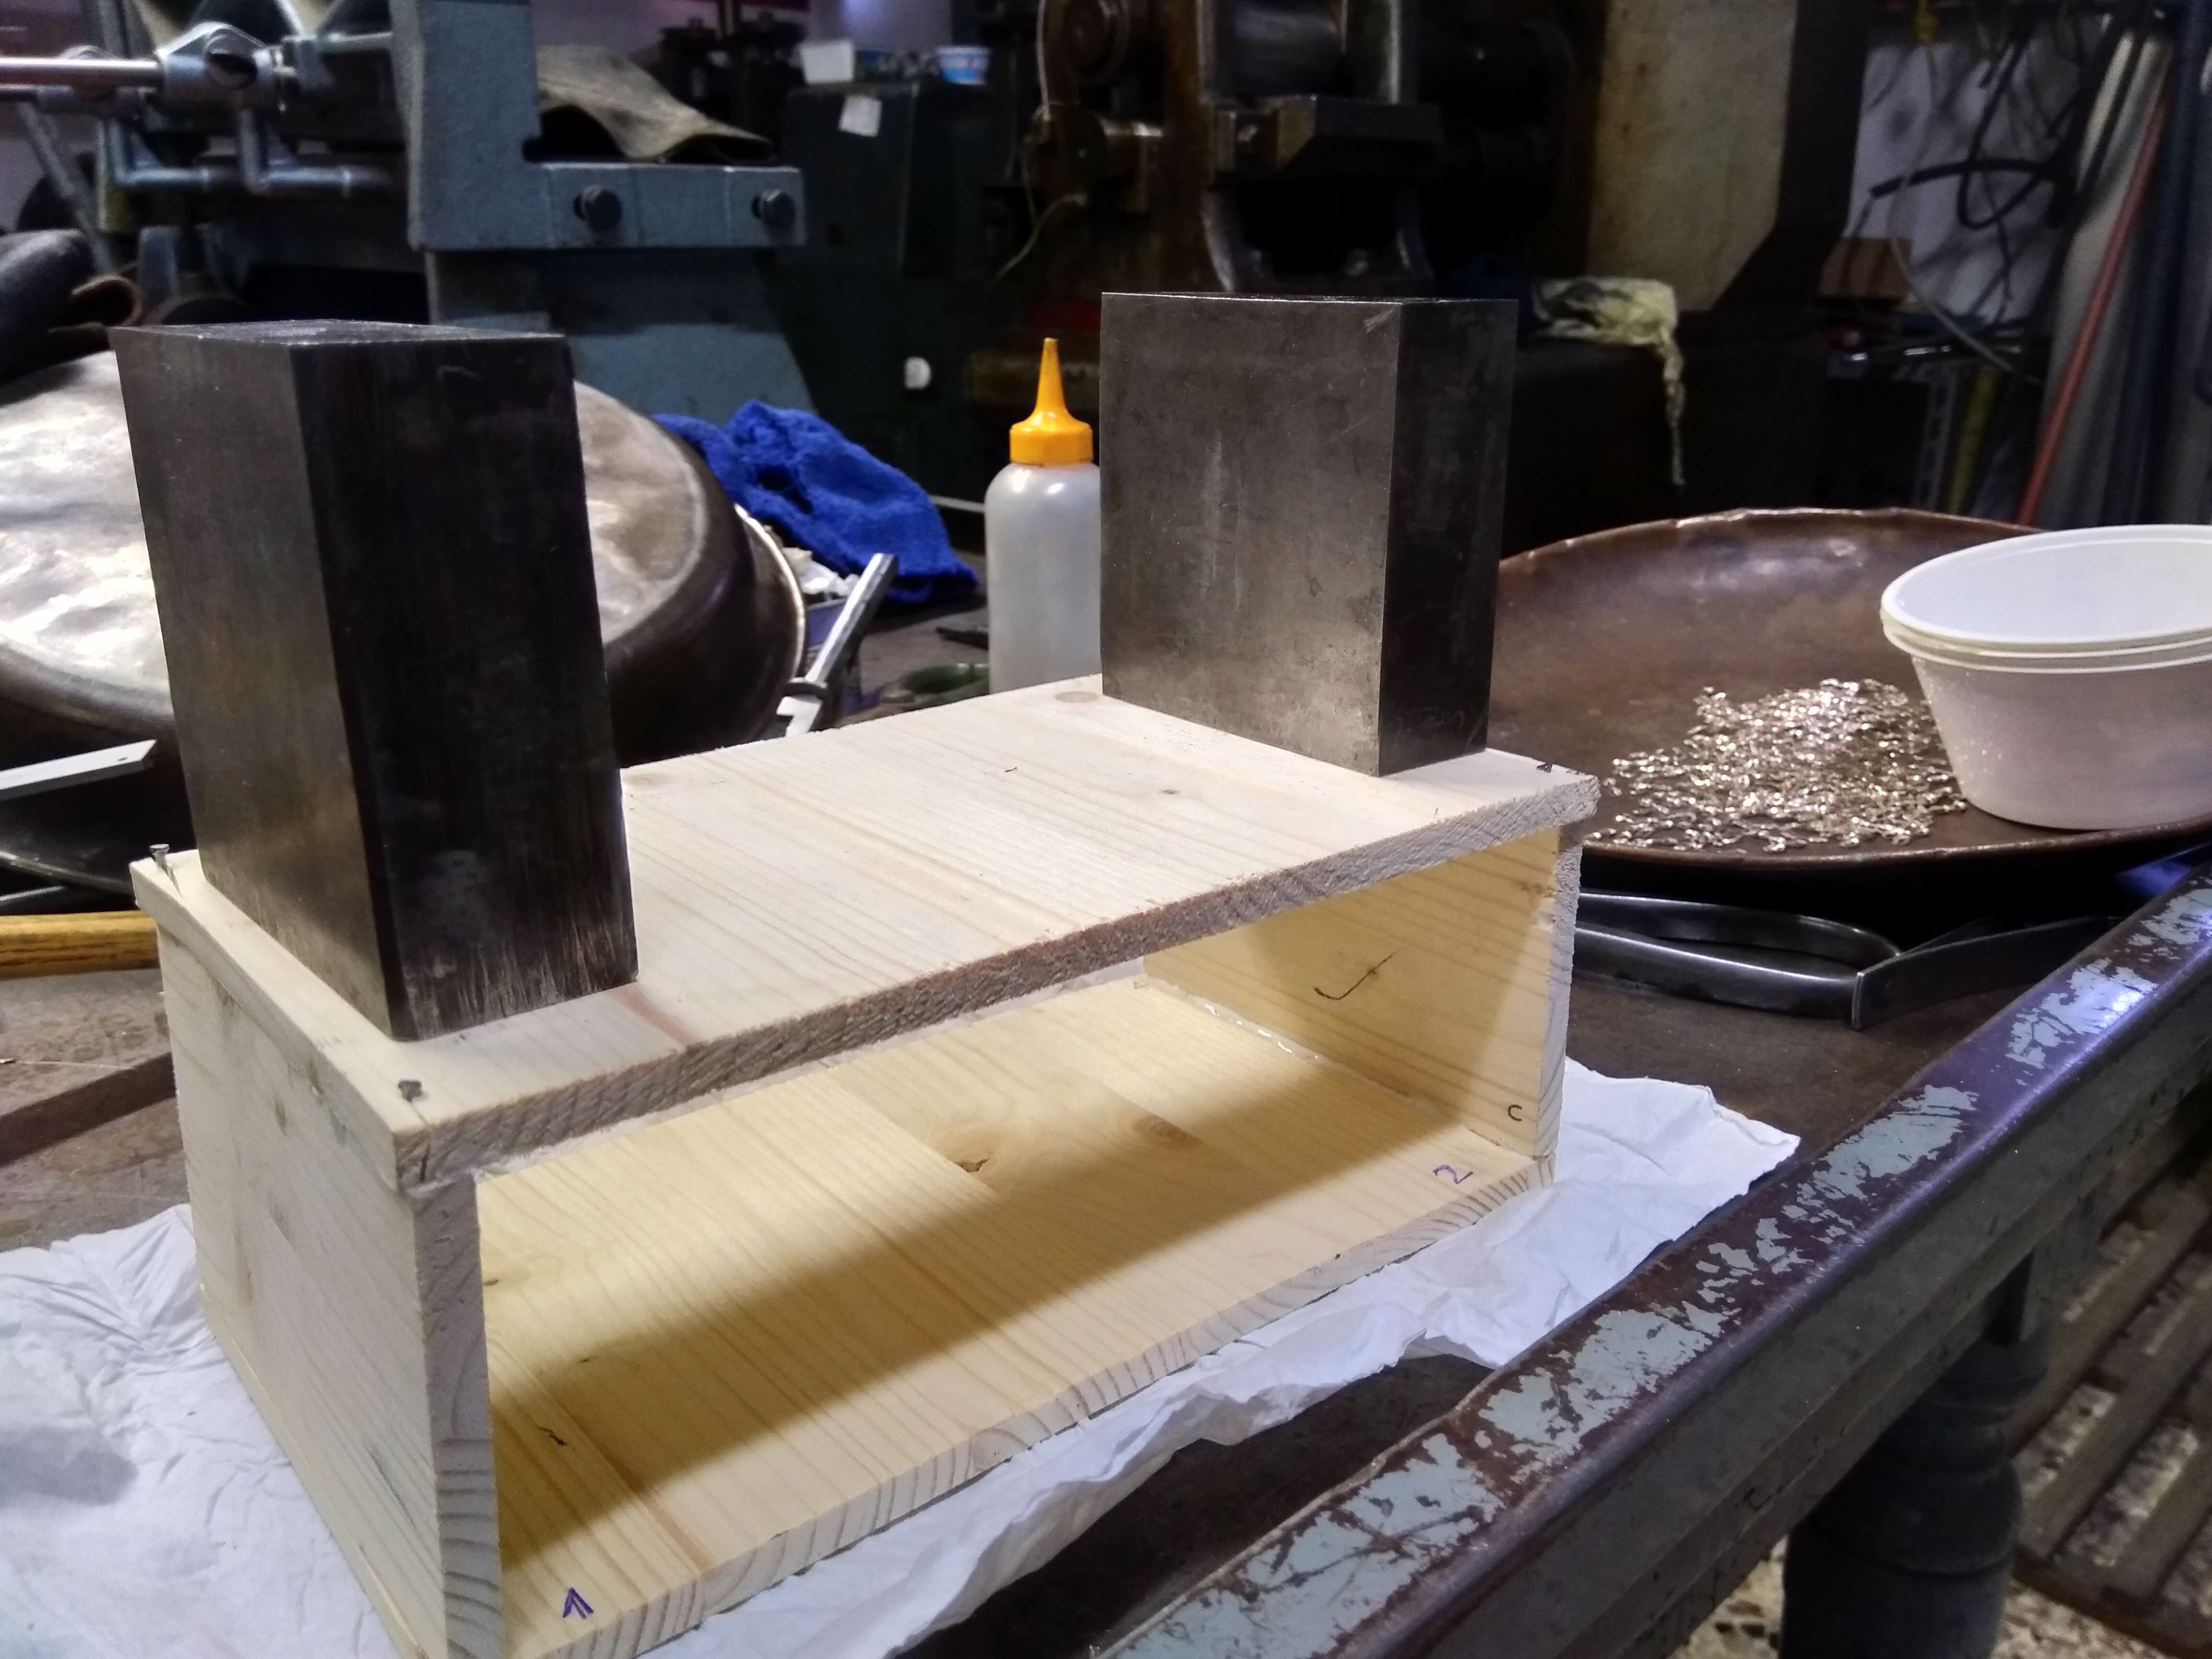
This part of the project was much more straight-forward. I got the wood, cut the pieces, tirelessly filed them to be as squared off as possible, glued and nailed together the bits, and painted with impregnating and protective paint.
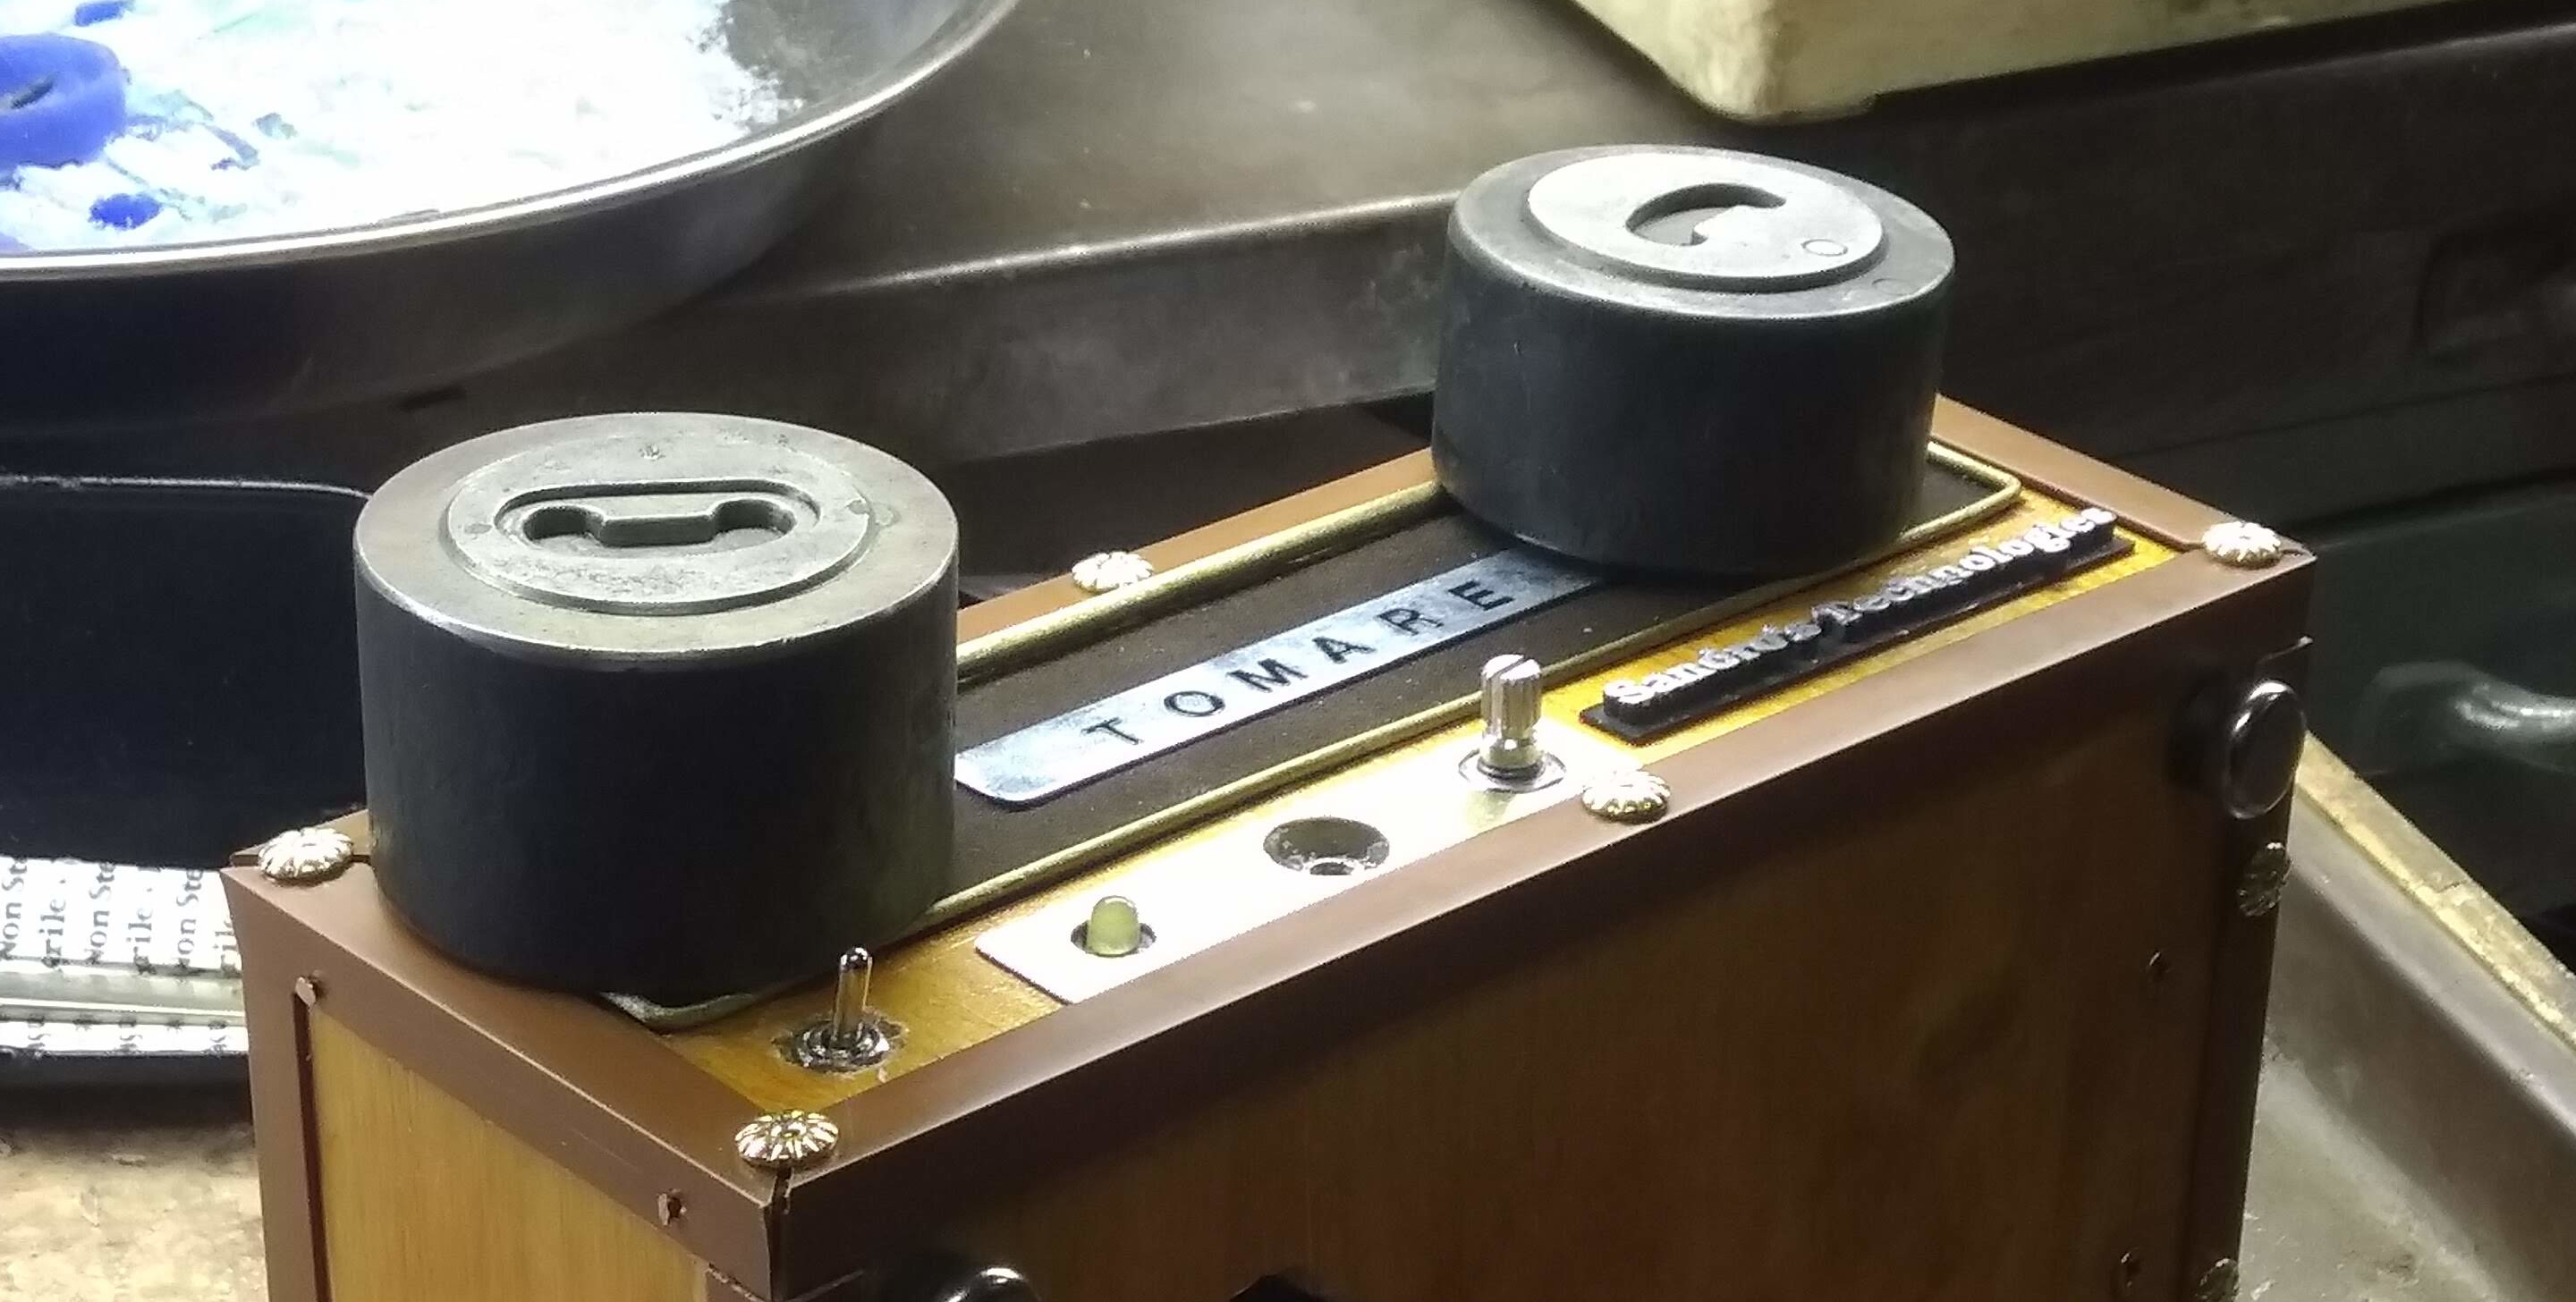
The more meticulous work came with all the holes for components and all the fancy details of the front mask. I wanted it to have one of those vintage looks I love, so the first step was obviously placing a piece of fabric with a name in the middle of the front. At first my choice was to hand knit it with hemp and embroider the name myself, but I could never reach the effect I was aiming for, so I went for a simple piece of fabric with a shiny metal name-plate glued on top. I surrounded this bit with a satinized brass contour and all the edges of the case with plastic wood-looking angle profiles, nailed to the wood with some incredibly matching polished brass nails.
Oh, and let’s not forget that sweet 3D-printed “Sandro’s Technologies” tag! After all… What is a product, if not its brand? ![]()
![]()